
 Internal Vibrator
 External Vibrator
 Submersible Pump
 Eccentric shaft
 Pendulum shaft
 Portable vbrator shaft
 Portable concrete mixer
 Vertical concrete mixer
 Hydraulic concrete mixer
 Walk behind power trowel
 Ride on power trowel
 Concrete screed
 Tamping rammer
 Plate compactor
 Vibratory roller


MAXMACH 140rpm Blade Speed and Surface Finish Quality: The RPM-Flatness Correlation in Walk-Behind Power Trowel Operations
Power Trowel Finish Quality Basics
Achieving a perfectly flat, glass-like concrete finish requires more than just luck; it demands a thorough understanding of the physical challenges present on the slab. Every job site presents a race against the clock, transitioning from the floating stage to the finishing stage. Let’s define those right off the bat. The floating stage happens after the concrete can support a footprint and bleed water has dissipated, when surface slurry is still highly present. The finishing stage kicks in as the concrete builds up enough strength to support the equipment without deep indentation.
To handle these stages, crews rely on the mechanical action of the equipment. A power trowel applies downward pressure onto the concrete surface through tilted blades. As the rotor spins, these blades perform a simultaneous action of scraping, compacting, and burnishing. It’s a beautifully violent process that transforms a rough, wet mix into a durable, tightly sealed floor.
Job-Site Challenges from Initial Set to Final Finish
One of the most significant challenges crews face is timing. If a machine is placed on the slab too early during the floating stage, it sinks, tearing the surface or burying the aggregate. If delayed too long, the concrete sets before it can be properly sealed. The key is adapting the machine's footprint and rotational force to match the curing state of the slab. Operators must constantly adjust their approach to manage the surface. Floating extracts slurry and performs initial leveling, while finishing burnishes and seals the surface as the slab hardens.
Key Terms: Blade RPM, Pitch Angle, and Contact Pressure
Mastering this process requires attention to three critical parameters: blade speed, pitch angle, and machine weight. For illustrative purposes, a typical mid-duty walk-behind unit in the 800 mm (31.5 in) class might operate at a maximum of 140 rpm. The pitch angle is often continuously adjustable between 1° and 15°, and a well-balanced machine in this specific class typically weighs around 90 kg (198 lbs). Running an 800 mm rotor at 140 rpm generates a blade tip line speed of roughly 5.9 m/s (19.4 ft/s). While these specifications provide a solid baseline for one model class, they are not universal industry standards; optimal settings will always vary based on the manufacturer, rotor size, mix design, and ambient conditions.
How to Measure Surface Finish Quality
Achieving the right balance of these parameters results in verifiable surface quality. While a simple 2-meter (6.5 ft) straightedge test—looking for a gap of no more than 3 mm (0.12 in)—is a common quick check, modern projects rely on recognized industry standards like ACI 117, TR34, or F-number (FF/FL) classifications. It is critical to note that FF/FL flatness is primarily established earlier in the process during screeding and bull-floating; Power Trowels seal and burnish the surface but cannot correct significant flatness defects established prior. Glossiness, on the other hand, is evaluated by the uniformity of surface reflection. By letting data and site conditions drive the machine setup, operators ensure that blade speed dictates gloss consistency, the pitch angle handles slurry extraction, and the machine's weight minimizes operator fatigue while maximizing stability.
How Power Trowels Work
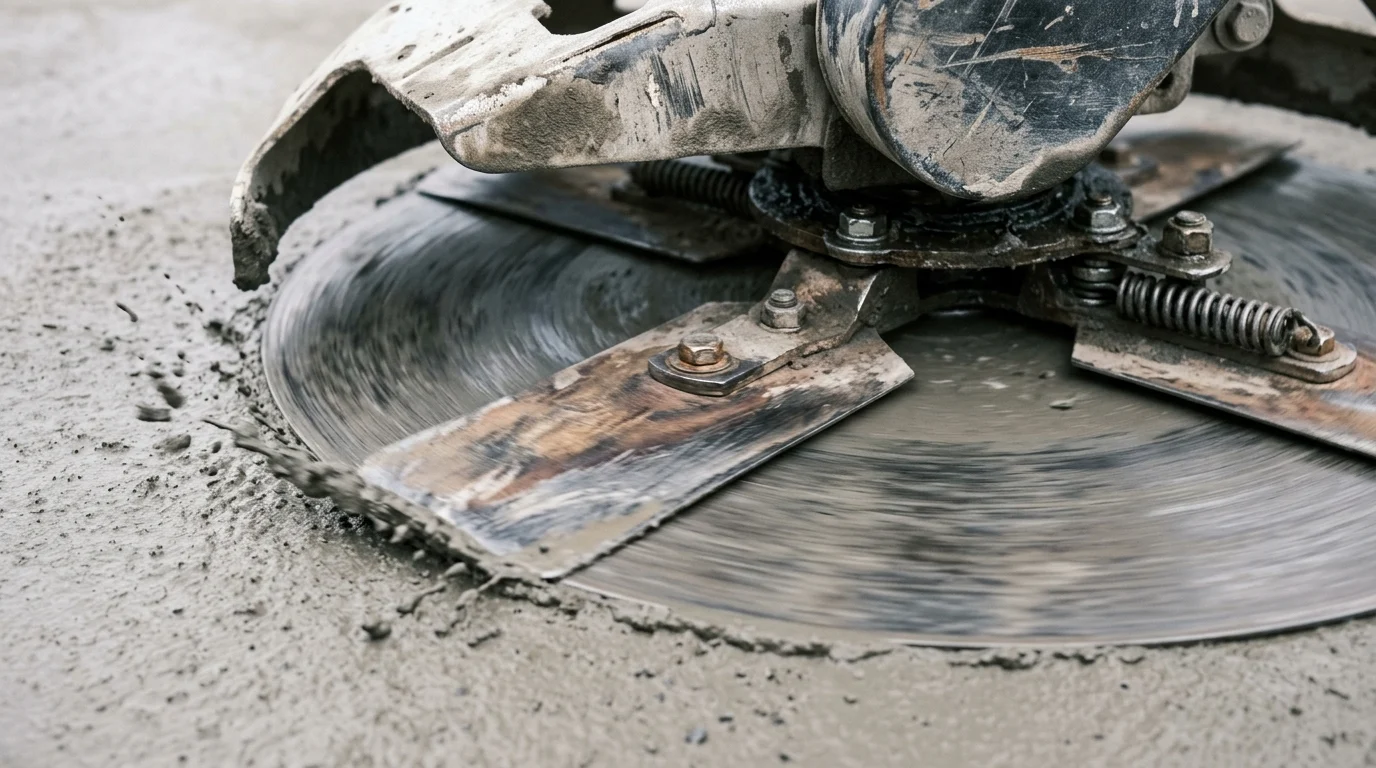
Understanding the core mechanical challenge is essential: how to efficiently transfer engine power into a smooth, hardened concrete surface without tearing it apart. The process is straightforward but heavily reliant on precision engineering. The power from the engine travels down through a heavy-duty gearbox, which steps down the high-speed engine output to a manageable, high-torque rotation at the rotor. This rotor then drives the blades across the slab, translating raw horsepower into the scraping and compacting action required as the concrete cures.
Engine, Gearbox, Rotor, and Blade Function
Examining the parameters that make this happen, professional-grade mid-sized walk-behind machines often feature engines delivering 5.0 to 5.5 HP. This power output ensures the rotor maintains a consistent speed even under heavy load when the concrete gets sticky. The physical footprint of the machine also matters immensely; for instance, an 800 mm class model provides a dimensional envelope that gives the operator enough leverage through the handle to steer the machine without fighting the torque generated by the gearbox.
How Blade Pitch Changes Contact Area and Pressure
The most significant adjustments occur through the blade pitch. The physics here are simple: the blade pitch determines the contact area between the steel and the concrete. As the pitch angle increases from 1° up to 15°, the contact area shrinks. A smaller contact area under the same machine weight means a massive increase in pounds per square inch (PSI) applied to the slab. At 1°, the weight is spread over a wide area to keep the machine from sinking into the wet mix. At 15°, that weight is concentrated onto the very edges of the blades to burnish and seal the hardening concrete.
Operator Sequence from Floating to Finishing
This adjustable system gives operators total control over the curing lifecycle. During the floating stage, operators typically keep the pitch at a shallow 1–5° to bring the slurry to the top and perform initial leveling. As the concrete begins to set, the pitch is transitioned to 5–10°, gradually increasing the surface pressure. Finally, during the finishing stage, the pitch is increased to 10–15° to achieve a tight, glossy seal. It is also important to note that operators will often switch blade types during this sequence—moving from float pans or float blades to combination or finish blades—to match the concrete's changing state, turning a rough pour into a polished masterpiece.
Choosing the Right Blade Speed
A common issue on industrial flooring projects is inconsistent surface gloss. It is common to see patches of high shine mixed with dull, porous spots. This almost always traces back to poor speed management. As the blades spin, they generate friction that mechanically densifies the cement paste, closes bleed-water voids, and creates a burnished surface. If the speed is wrong, the friction is wrong, and the finish suffers immensely.
Why 140 RPM Is a Practical Finishing Speed
Optimal blade speed varies significantly by rotor diameter and manufacturer, with typical finishing ranges spanning from 100 to 180+ rpm. For an 800 mm (31.5 in) working diameter, 140 rpm serves as a practical illustrative sweet spot. At 140 rpm, the outer edge of the trowel blade travels at a line speed of approximately 5.9 m/s (19.4 ft/s). Experience shows that this specific line speed provides an excellent balance for mid-sized machines. It’s fast enough to generate the friction needed for a high-gloss finish, but slow enough that the operator can still physically guide the machine without being overpowered by the torque.
Risks of Running Blade Speed Too Low or Too High
Running the machine too slow—say, around 100 rpm during the final finishing stage—results in insufficient polishing action, leaving the surface dull and porous. On the flip side, pushing a machine past its ideal threshold creates a nightmare. Not only is there a risk of tearing out aggregate, but premature high-RPM finishing can trap bleed water and cause severe surface delamination or scaling. Furthermore, excessive centrifugal force can cause the operator to lose directional control, leading to an uneven, wavy floor that will fail industry flatness standards. High-RPM operation also introduces significant safety risks, including the potential for severe injury from accidental blade contact if control is lost.
Floating vs Finishing Speed Comparison
Dialing in the correct speed allows operators to dictate surface gloss consistency. During the floating stage, the throttle is typically dialed back to 100–120 rpm to avoid flinging wet slurry off the slab. Once the slab reaches the finishing stage, the speed is increased to a higher RPM. However, blade speed, pitch, and timing must always be adjusted for concrete temperature, humidity, wind, and mix slump—they should never be locked to a fixed rule.
| Operation Stage | Concrete Condition | Typical RPM | Pitch Angle | Primary Goal |
|---|---|---|---|---|
| Floating Stage | Post-bleed, heavy slurry | 100 - 120 rpm | 1° - 5° | Leveling, slurry extraction |
| Transition | Initial set beginning | 120 - 130 rpm | 5° - 10° | Compaction, minor leveling |
| Finishing Stage | Firm, supporting weight | 140+ rpm | 10° - 15° | Surface sealing, high gloss |
Respecting these general line speed limits ensures maximum finishing efficiency without sacrificing operator control or surface integrity.
Matching Pitch Angle and Machine Weight
Operating a power trowel involves a significant physical toll. A major challenge is balancing operator fatigue against machine stability. When maneuvering a spinning piece of steel on wet concrete for hours, every single pound matters. The machine must be heavy enough to push the blades into the concrete to create friction, but light enough that a single operator can maneuver it continuously and tilt it back on its wheels for transport without risking injury.
How 1–15° Pitch Ranges Match Finishing Stages
Having touched on the 1–15° pitch range, it is worth exploring how this interacts with the machine's mass. When the pitch is adjusted via the control knob, it mechanically changes how the machine's weight interacts with the slab. The continuous 1–15° adjustability means there is no need to stop the engine to change the blade angle. Operators can react in real-time as the concrete cures, ensuring the slurry extraction efficiency is maximized at low angles, and the surface sealing effect is maximized at high angles.
Balancing a 90 kg Walk-Behind Power Trowel
In the realm of walk-behind units, which are manufactured in a range of rotor diameters from 600 mm up to 1000+ mm, a 90 kg (198 lbs) machine is considered a mid-weight configuration for the 800 mm class. This specific mass provides enough downward force to prevent the machine from bouncing or chattering when spinning at high speeds. Yet, it’s light enough that the side-to-side lateral forces generated by the rotor don't rip the handle out of the operator's grip during a long shift.
Walk-Behind vs Ride-On Power Trowel Selection
This mid-weight setup offers a massive reduction in operator fatigue while maintaining total operational stability. But how does this compare to larger equipment? A walk-behind unit with an 800 mm diameter is generally used for pours under 500 square meters (approx. 5380 sq ft) or for tight edge work around columns and walls. For anything larger, a ride-on trowel becomes necessary.
| Feature / Spec | Walk-Behind (e.g., 800mm class) | Ride-On Trowel |
|---|---|---|
| Machine Weight | ~90 kg (198 lbs) | 300+ kg (660+ lbs) |
| Working Diameter | 800 mm (31.5 in) | 2 x 900+ mm (36+ in) |
| Ideal Pour Size | < 500 m² | > 500 m² |
| Edge Capability | Excellent (tight corners) | Poor (requires manual edge work) |
Matching the appropriate machine weight with the correct pitch range gives operators the perfect balance of downward pressure and maneuverability for mid-sized pours.
Power Source and Specification Checklist
The final challenge prior to starting the engine is site compatibility. It is unsafe to run a loud, exhaust-heavy machine in an enclosed hospital basement or an underground parking garage. Manufacturers have solved this by offering multiple power plants mounted to the same core gearbox and chassis, allowing crews to adapt the tool to the specific environmental constraints of the job site.
Gasoline, Diesel, and Electric Power Trowel Options
Examining the three main power options reveals distinct advantages. Gasoline models are the industry standard; they are lightweight, start quickly, and produce moderate noise levels around 85–90 dB. Diesel models offer roughly 20–30% better fuel economy and higher low-end torque, making them ideal for remote, off-grid sites where fuel deliveries are sparse. However, both gasoline and diesel units present severe carbon monoxide (CO) risks and must never be used in enclosed or poorly ventilated spaces. Finally, electric models operate at a whisper-quiet 70–75 dB with zero local emissions, making them the only safe choice for unventilated indoor environments. Regardless of the power source, all three options are engineered to deliver consistent horsepower, ensuring that blade speed remains stable when the blades bite into hardening concrete.
Decision Matrix by Job Location and Pour Size
When specifying a machine for a job, site-specific parameters must take precedence over raw power. Indoor pours with poor ventilation strictly require electric models to eliminate fatal carbon monoxide hazards. Outdoor, mid-sized commercial slabs are perfectly suited for Gasoline Engines due to their balance of power and portability. For heavy-duty, continuous outdoor operations where diesel fuel is already on-site for other heavy machinery, a diesel trowel streamlines logistics. Selecting the right power source ensures operational efficiency without violating safety or noise regulations.
Practical Power Trowel Specification Checklist
Having these options provides total job-site flexibility without sacrificing finish quality. Here is a practical specification checklist illustrating a typical pro-grade mid-sized walk-behind trowel (note that these specifications represent one common model class, not a universal industry standard):
- Working Diameter: 800 mm (31.5 in) for a balance of coverage and edge work (though 600 mm to 1000+ mm options exist).
- Blade Speed: Up to 140 rpm max (yielding a 5.9 m/s line speed on an 800 mm rotor).
- Pitch Adjustment: 1° to 15° continuous range.
- Weight: ~90 kg (198 lbs) for optimal stability and low fatigue in this size class.
- Power: 5.0 - 5.5 HP (Gas, Diesel, or Electric).
- Dimensions: Approximately 1520 × 612 × 950 mm (59.8 × 24.1 × 37.4 in).
By understanding these data points and selecting the right equipment for the environment, crews eliminate much of the guesswork from concrete finishing, ensuring every slab meets the highest standards of flatness and durability.
Further reading:
Key Takeaways
- Use 140 rpm as a model-specific reference point, not a universal setting, because rotor size, mix design, and curing conditions change the ideal blade speed.
- Begin floating only after bleed water has dissipated and the slab can support the machine without deep indentation or surface tearing.
- For an 800 mm rotor at 140 rpm, expect an approximate blade tip speed of 5.9 m/s, which helps explain the machine’s burnishing effect.
- Keep blade pitch low during floating and increase it gradually toward 15° during finishing as the concrete gains strength.
- Verify surface quality with a straightedge, ACI 117, TR34, or FF/FL criteria, while remembering that power trowels cannot correct major flatness errors from earlier screeding.
Frequently Asked Questions
Is 140 rpm the ideal blade speed for every power trowel?
No. A 140 rpm rating is a useful reference for some walk-behind power trowels, but optimal speed depends on rotor diameter, concrete set, blade type, mix design, and site conditions.
How does blade speed affect concrete surface finish?
Higher blade speed increases burnishing action and surface sealing, but using it too early can tear wet concrete. Lower speed is better for floating and early-stage surface control.
Can a walk-behind power trowel fix poor slab flatness?
Only to a limited extent. Flatness is mainly created during screeding and bull-floating. A power trowel improves surface density, smoothness, and gloss but cannot remove major highs and lows.
When should operators start using a power trowel?
Start after bleed water has disappeared and the slab can support the machine without deep sinking. If the trowel leaves heavy marks or tears the surface, it is too early.
What pitch angle should be used for floating and finishing?
Use a low blade pitch during floating to spread pressure and avoid digging in. Increase pitch gradually during finishing as the concrete hardens and needs more burnishing pressure.